

Imaginet blog
Customizing SharePoint Themes Using PowerShell
When it comes to choosing the color scheme for your SharePoint site, the default options may not be quite what you are looking for. Out of the box, SharePoint only comes with 12 distinct color schemes. And most of the time, these color schemes do not mesh well with your Company’s branding. To perfectly match your Company’s color scheme, you can create and upload custom themes.
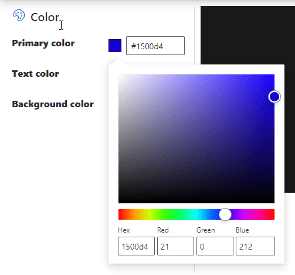
Using Microsoft theme designer, customizing SharePoint themes is pain-free and made even easier. This designer is available at Fluent UI Theme Designer (windows.net). With this designer, you can set primary, secondary, and background colors. These color options are shown in real time using an example of a SharePoint page with icons, drop-down menus, and free text boxes.
One of the best features of the Fluent UI Theme Designer is the “Accessibility Checker” which shows how legible the text is with the chosen color scheme.
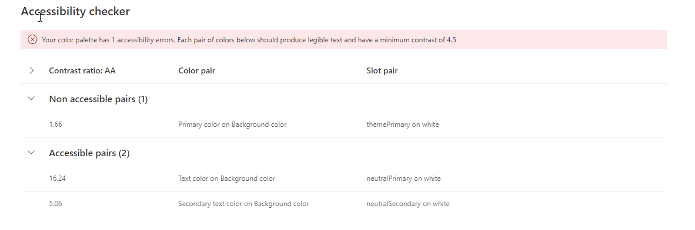
As you can see in the example above, the color scheme chosen shows a contrast ratio error with the primary and background colors. Playing around with the different shades of these colors can give you a theme that passes all the accessibility tests and is ready to export and install.
After choosing the appropriate colors for your customized theme, follow the instructions below to export and install.
1. Click the “Export Theme” button at the top right of the page.
2. Click on the PowerShell option, select all and copy the text to a text editor, such as Notepad.
3. Download and install the SharePoint Online Management app from Microsoft here.
4. Open the SharePoint Online Management app.
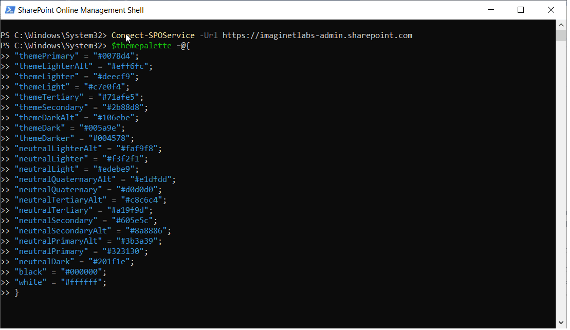
5. At the prompt type: Connect-SPOService -Url https://domain-admin.sharepoint.com (replace domain with the appropriate SharePoint domain name), then press Enter.
6. At the login screen, log in with your SharePoint Admin credentials.
7. Once logged in, at the command prompt, type $themepalette =Paste in the code from Step 2. The window should look like this:
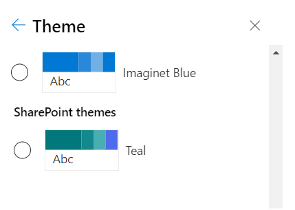
8. Press Enter, then type the following: Add-SPOTheme -Identity “Theme Name” -Palette $themepalette -IsInverted $false (Replace Theme Name with the name you want to give your theme). Note this name will be visible to those with access to the change the look, so give it a name appropriate to your Company. Press Enter and the theme will be installed and can be chosen from the “Change the Look” menu.
Hope this tutorial helps you quickly and easily customize the look of your SharePoint site to reflect your professional style and brand.

discover more

SQL Saturday Part 2: Learning About Microsoft Fabric
SQL Saturday Part 2: Learning About Microsoft Fabric February 29, 2024 I’ve been digging into Microsoft Fabric recently – well overdue, since it was first released about a year ago.…

My Trip to SQL Saturday Atlanta (BI Edition): Part 1
My Trip to SQL Saturday Atlanta (BI Edition): Part 1 February 23, 2024 Recently, I had the opportunity to attend SQL Saturday Atlanta (BI edition), a free annual event for…

Enabling BitLocker Encryption with Microsoft Intune
Enabling BitLocker Encryption with Microsoft Intune February 15, 2024 In today’s data-driven world, safeguarding sensitive information is paramount, especially with the increase in remote work following the pandemic and the…
Let’s Build Something Amazing Together
From concept to handoff, we’d love to learn more about what you are working on. Send us a message below or call us at 1-800-989-6022.